As you guys know I adore the great outdoors and anything that makes the outdoors even more enjoyable is OK with me; so when I was contacted by ThorFire and asked if I would like to show you guys some handy gadgets I jumped at the chance.
Today Im showing the very clever ThorFire Camping LED telescopic mini lantern that is also a torch and dynamo charger for your devices.
I've even added a video to show you how good this little gadget is.
Packaging
I kindly received a parcel with a few things to show you guys which are coming soon. My courier was a little over enthusiastic at getting my parcel in the postbox so the packaging is a bit dented; but its all undamaged.
In the box you get your ThorFire lantern, leaflet instructions and 2 cables.
One for charging via mains USB power if you have a power charger or USB straight from your PC. The other Female USB to hand crank charge a USB device.
ThorFire lantern closed
Description
The ThorFire telescopic lantern is made of several types of ABS plastic, making it extremely light and portable at only 5.9oz. I love the colorful orange which is synonymous with outdoor products, so it makes it easier to find in your bag or rucksack. It fits comfortably in the palm of your hand closed at only 8.4cm in diameter and 4.4cm in depth. Open it measures12.2cm high. This amazing little gadget has a bundle of uses,
Torch.
Lantern.
USB Charger.
Conversation curiosity starter.
The Science Bit The high level light on both torch and lantern is 65 lumens. The low level is 15 lumens but you can see how bright 15 lumens is on the video; its plenty to see what your doing. NOTE;the manual states 65 and 15 lumens but Amazon states its 160 and 30 lumens. I feel Amazon maybe correct as its very bright compared to the 65/15 lumens; I will try to find out for you all.
Lighting Times Approx It takes 4 hours to charge via USB. High level will last approx 40 minutes Low level 4.5 hours. 1 minute of cranking gives 4 minutes of high level light. 1 minute of cranking gives 11 minutes on low. Are you still with me....
The Working principle The ThorFire adopts the principle of cranking for power by 3 phase brushless alternator for power generation. The power is then stored in the built in 300mAh/3.7V lithium battery. This is then used totally for the LED light.
The top part of the lantern shows the torch with a magnifying circle to amplify the light to its best.
The side has the rubberized charging port and on/off button.
The underneath has 3 rubber feet and the dynamo cranking handle and the carry handle. A brilliant design they've thought of everything to cram into such a small space.
Opened up it extends out to give you a comfortable cranking circle.
A clever addition is the cranking handle grip which spins as you turn saving tired wrists and pinky blisters...I love companies who think of the little things.
The handle opens up to be used as a carry handle or hanger for inside a tent or on a tree or bush as seen in my video.
The most clever thing is that this compact portable torch opens out to a usable lantern that gives off the perfect amount of light for camping. See my video.
Simply but gently pull the halves apart to reveal a great size lantern. You can see the clips that hold the 2 ends together when not in use or used as a torch.
Charging
Next plug in the 3.5mm charging cable (supplied) and charge, mine arrived half charged and was ready in a few hours. It has a protector flap which protects from dust and damp so you really don't have to worry about this tough little lamp.
Charging a USB device or phone
So you find yourself in the middle of nowhere and yes you guessed it, your phone dies and you need an emergency phone call.
But you have your Thorfire lamp and emergency charger yay!
So get out the female USB cable and your own phone charger cable and connect them together.
It should look like this. Now start to crank the dynamo. Now the instructions say 3 circles a second...er...well...this maybe a bit difficult more like 1-2 circles a second unless your Britain's strongest man or woman of course or they happen to be tagging along with you, in which case they could carry you to safety.
Now you need to keep cranking for at least a few minutes until you see your phone with at least 2% to get your call.You will also see the red LED light up on the ThorFire to say its charging.This is best seen in my video.
Now in all honesty this would kill my arm to keep this up so hopefully when or if I need an emergency phone charge, that I have my other half with me. But it does the job and afterall it could save a life.
Note: It also has a smart protection chip incase of over charging...clever little lamp! Interesting NOTE; it charges your device both backwards and forwards for all you lefties out there or if you just want to go backwards.
Lantern and Torch I have to say WOW as the light is really bright on both the torch and the lantern. You will see in my main video that I actually thought I had the torch and lantern on High yet it was still on low so my surprise is absolutely genuine. I didn't realize that every time I turn off the ThorFire it resets back to low each time. But you have to think of how long you need to use your light as this lantern doesn't hold its charge as long on high.
Here you can see the difference between Hi and low torch settings, I had placed the torch facing a bush over 14 feet away and you can see how the high beam lights up all the surrounding area.
Lighting Tests
I just have to add my own lighting tests to this review for you guys.
The instructions say 40 mins on high after being charged via USB.
BUT on our test its managed...wait for it...drumroll...45 minutes on high where it dropped to low and lasted another 3 hours15 minutes...amazing huh!
More tests to come......
Checkout my video on using the ThorFire lantern/torch and using it to charge my phone.
Opinion
I have to say Ive fallen in love with this lantern/torch. The fact that during a powercut...of which we get alot of out here. I have guaranteed power for a light is just amazing and it gives us peace of mind. Its an ideal storm lantern to keep nearby when the weather turns. We now make sure its always charged via USB and its kept to hand just incase. But incase we forget I always have hand power...er...or...my strong man power lol! As a torch it really gives great light even on low...essentially you don't need to use high unless your desperate to find something, low is plenty as you can see in my video. The lamp gives fantastic ambient light perfect for tents or reading etc.
I have added the video as well as you need to see this clever lantern in action as me rambling on saying its got great illumination is all very well; but sometimes you need to make up your own mind that its right for you.
Once you open it out, the corrugated plastic is strong and the whole lantern is splash proof and most certainly rain proof with its rubber power closure. The lantern really gives amazing ambient light and the torch great direct light you have a 3 in 1 product; Torch, lantern and charger.
I'm so impressed and I really have a thing for outdoor products too, its rugged, light, portable and once collapsed down its easily thrown in your backpack or bag to take anywhere, you barely know your carrying it. Ive dropped it a few times and its definitely scratch and drop proof. I feel every home NEEDS one of these especially if your die hard campers or hikers its an essential; its a brilliant 3 in 1 affordable gadget.
I have 2 more Eachine Thorfire products for you coming up soon. The ThorFire 540 lumens Cree torch and the Mushroom speaker lamp...isn't this just adorable.
All my thanks goes to Eachine for kindly sending me this lantern for this review. All my views and opinions are my own.
Im excited to have the opportunity to show you guys this incredible piece of kit.
Do you love your camera's and video, always wanted a GoPro but just cant justify it, Well now you can have that technology for less than half the price with a bag full of accessories.
Are you planning an adventure holiday, or are you off hiking, mountain biking, abseiling or do you just want to capture every part of a special moment to treasure and keep in Full HD video and 12mp photos.
If you have been watching my reviews you would have seen my action cam The Splash in December also from KitVision.
(Scroll down as well for series of 3 videos Part 1& 2 part very soon.)
I warn you guys now its a long review as Ive so much to tell you and show you as I have lots of video footage as well as photos soo...go grab a drink...some nibbly's and I'll begin.
Where's WALL-E? Confused....see more after the break.
Packaging
I really love the packaging as I feel I'm getting an expensive, high quality gadget I can see it its full glory and the box has all the basic information for me to want to rip it open and start using it.
A plastic transparent packaging with a cardboard box and the action cam screwed firmly to the lid holding the whole thing securely for any delivery.
Inside you get your gorgeous Waterproof Full HD Action camera attached to the cardboard box using its own tripod mount.
But thats not all, you also get a full 17 piece kit...including the Waterproof case and the Escape.
Bicycle Mount
Helmet mount
Mount connector clip
Curved adhesive mount
Flat adhesive mount
2x3M adhesive pads
Action cam to 1/4 inch tripod screw adapter
Action cam to 1/4 inch tripod thread adapter
Tripod adapters
Mount adapter
90 degree adapter
Vented helmet mount straps
2x Velcro straps
Waterproof case to 60m
User manual
USB cable
Safety cable
Escape camera
Mounts and Adaptors
I cannot stress how excited I was to find all these mounts and adapters as with another...er...well named action cam...you have to buy most of it separately costing you a small fortune ontop of the camera. If you guys are anything like me you don't know what mount you need till you need it; but with the Escape you can juggle and build your own mount from what they have given you in the box.
The straps are made from nylon webbing that mountain climbers use so your cam seriously isn't going anywhere once strapped in place. You then have a back up of a sticky underneath the mount of choice. The 3M stickers are known for being super strong.
The bicycle mount and indeed all the mounts and adapter are made of super strong black ABS plastic and have been well designed to adapt to whatever you may need. Along with stainless steel nuts and bolts.
You can see here how simple it is to pop it on your bike. Plus you can add an extra adapter to make it swivel etc.
You could use this same mounting on a car, jeep anything which has a pole or crossbar.
Even a bird feeding station...see later on...!
This image shows how to make the tilt mount with the attachments provided. I love how clever the designers have been with these.
You then have this mount made from the 2 adaptors shown above. You have the choice whether to add the straps or a sticky pad.
You can then add the 2 long straps to secure it onto a helmet or skateboard etc.
Well guys and gals, this is one incredible piece of kit. The perfect action cam for those of you with a mad hectic life and don't want to miss a second, or someone into extreme sports who wants to capture what they do to show their friends or to capture that special holiday or occasion.
If your a diver then your in luck as this baby can go down to 60m while recording at Full HD video and wait for it....12 million pixel images too...WOW!
So lets start with some specifications for you so you can really see what this can do:
Video Resolution: 1080p / 30fps, 720p / 30fps
Video Format: MOV
Photo Resolution: Up to 12MP
Storage: Micro SD (up to 32gb)
Photo Modes: Single shot / Timed / Burst / Time lapse
Frequency: 50Hz / 60Hz
USB Interface: USB 2.0
Battery Capacity: 700mAH
Power Consumption: 260mA @ 4.2V
Recording Time per charge: About 90 minutes (based on highest settings)
Operating System: Windows XP / Vista or Above / Win7 / Mac OS
An it only weighs 58g
Front of the Escape.
The KitVision Escape look round
When you take out the Escape it really is so very dinky at ONLY
6cm x 3cm (over the lens area) x 2.5cm in size. I knew it was small but when you take it out the case its tiny!
It has an excellent quality feel, substantial in weight for its size and the outer sides are made of the soft black rubberized coat. So you can grip it even with damp cold fingers. However its that type of coat that marks easily which is a slight peeve of mine.
It has a front mode button which allows you to scroll through the settings too. The wifi symbol shows clearly what this little cam has compared to some others.
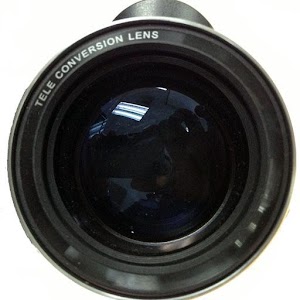
The camera lens itself is only 2.2cm in diameter and protrudes out slightly from the camera by approx 0.5cm.
Back of the Escape
The back has a complete clear cover making it easy to clean but the actual LCD screen is smaller than the Splash's which is a shame as there is plenty of space.
It measures 3.2cm x 2.4cm; The Splashes screen is 3.8cm x 3.2cm, but saying that it is extremely bright and clear and is still easy to see.
Down the side you can see 2 small LEDs the top shows red when charging and the one beneath it shows blue so you know when its trying to find the wifi signal.
Ontop of the Escape is the rubberized shutter button with a red ring on; next to that is a green LED which flashes when its recording.
Underneath the Escape is the battery compartment which allows you to replace the battery or buy a few spares if you are going hiking and know your not going to be near a leccy supply to charge it.
On one side you have your HDMI port, charging port and SD card slot for upto 32gb SD cards.
On the other side you have your wifi sender button which also doubles as up and down scrolling settings buttons. These are both extremely responsive and good quality.
If you look closely you can also see the built in microphone holes.
Not forgetting the waterproof case which is excellent quality.
I cannot stress enough how good quality this case is.
Inside there are moulded side struts that hold the camera firmly and securely getting no jiggle at all. Perfect during any energetic activity.
Front of the case.
The front of the case has a reinforced area over the lens to add real protection, this cam is for serious hobbyist and this screen isn't going to scratch or crack without a real fight.
I particularly love the mega secure top latch, its so secure you have to fiddle a little to get it open, it has a locking slider to open and close. Despite being completely made of plastic its super strong and Ive given this some real use and hasn't in any way weakened or broken or bent.
Use
I just couldn't wait to start using this adorable little cam so I plugged it in straight away. The instructions don't say anywhere for how long to charge it for, so I left it till the led went off which was approx 4 hours later so I left it for an extra 2 just to make sure as you know Im picky on first battery charges.
Note:the instructions say its a blue indicator while charging, I just wanted to show you...its red!
It turns off when fully charged, I love it when gadgets do that, Ive noticed more and more doing this...yay...KitVision.
Next pop in your SD card into the SD slot and away you go...but your best to just scroll through the settings first to set up your preferences and it dosent hurt to format the card in the unit itself. *For those of you that struggle with settings my Part 1 video has a guide through every step with explanations of what they mean.
To turn on press and hold the front mode button for 5 seconds, the same to turn off.
Video Footage I have 3 videos to show you.
Part 1 Unboxing and look around and a complete settings overview with explanations.
Part 2 is at this moment 415 minutes till publishing and Part 3 will be coming straight after. YouTube uploading is taking for-evvvvver !
Part 2 Is all about the amazing remote viewing with some fun footage samples.
Part 3 is some actual video samples to show you guys how good the quality is, you can see for yourself rather than me rambling on. Hope you enjoy them as much as I did making them.
Video Part 1
I will just mention to you briefly the settings as my main video Part 1 shows it much better. As soon as you turn on your Escape it takes you straight into video mode, so you can start recording instantly.
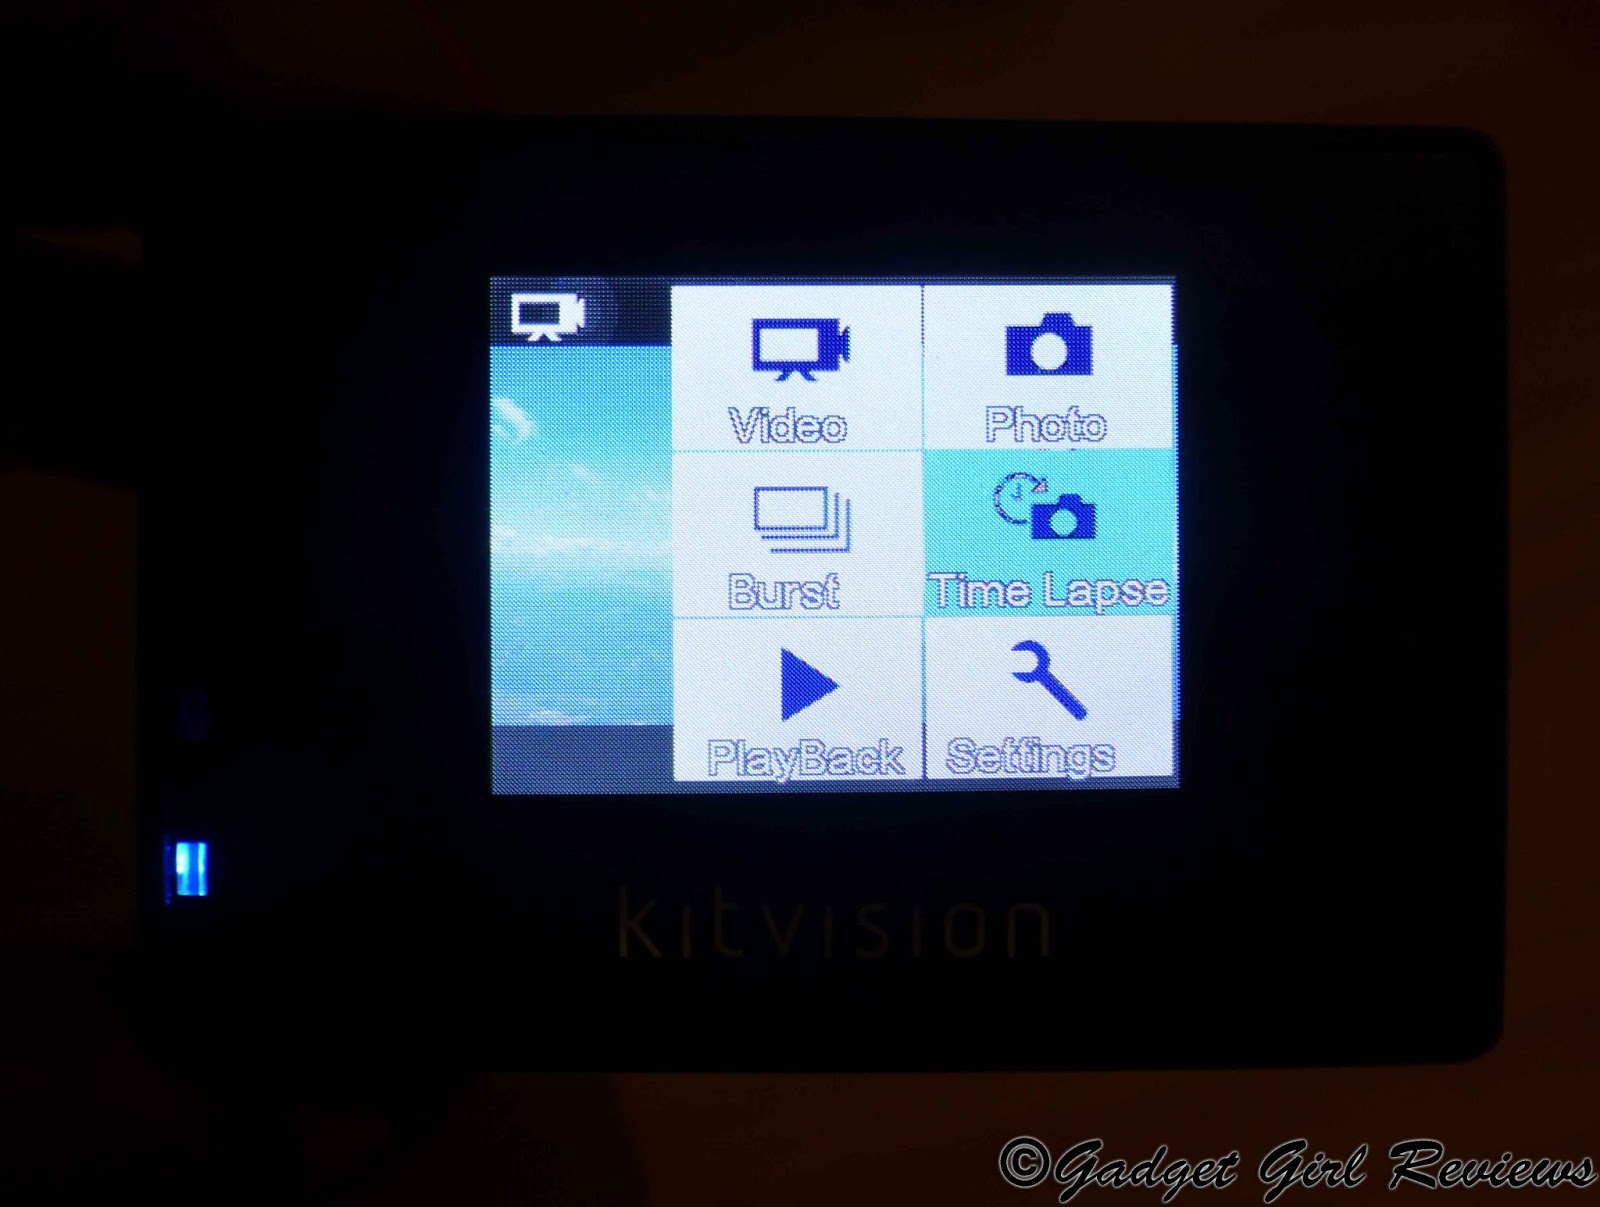
By pressing the front MODE button it takes you to the main screen for 6 main options.
Video for recording video.
Photo for photos.
Burst Takes series of 3/5/10 images for sports etc.
Time Lapse Takes a photos at a chosen intervals until deactivated.
Playback views all captured files on the LCD screen without downloading.
Settings for changing all the cams settings.
The wifi side button and the button beneath it allow you to scroll up and down through them; so easy peasy. Its easy to set up and easy to alter on the fly too.
The screen is bright but it is small; but then your not spending alot of time looking at the back screen, its only for settings.
Audio The audio is good as you will see in part 3 of my video series...coming soon! But inside the case it gets quite muffled so if you want good sound too, you need to remove the case.
Footage
So Ill start with what we did to get footage. First of all we decided to take it with us on a trip to the Sealife centre miles away from us. Ive wanted to go for years so what better time when I needed to test out our new cam.
So what settings did I use...well I have to say I simply set anything I could on Auto and that was it. I carried it in my hand like a normal camera rather than fixing it to my hat or jacket as I wanted to see how stable it was as I do have a problem with shakey hands...not the best for a photographer so I knew there maybe a problem with the person holding the cam...er...me. BUT...I was pleased to find as you can see from my video its NOT shakey at all...OMG Im so pleased...thank you KitVision!
Next quality of video...well what do you guys think...I personally think its gooorgeous. The video is crisp and clear and the colours are rich and well saturated. There isn't a setting for saturation but I love that its automatically so bright and colourful.
I found it easy to switch between video and camera; something important when on day trips as you want a mix of both and don't want to miss anything while having to fiddle with camera settings...we've all been there.
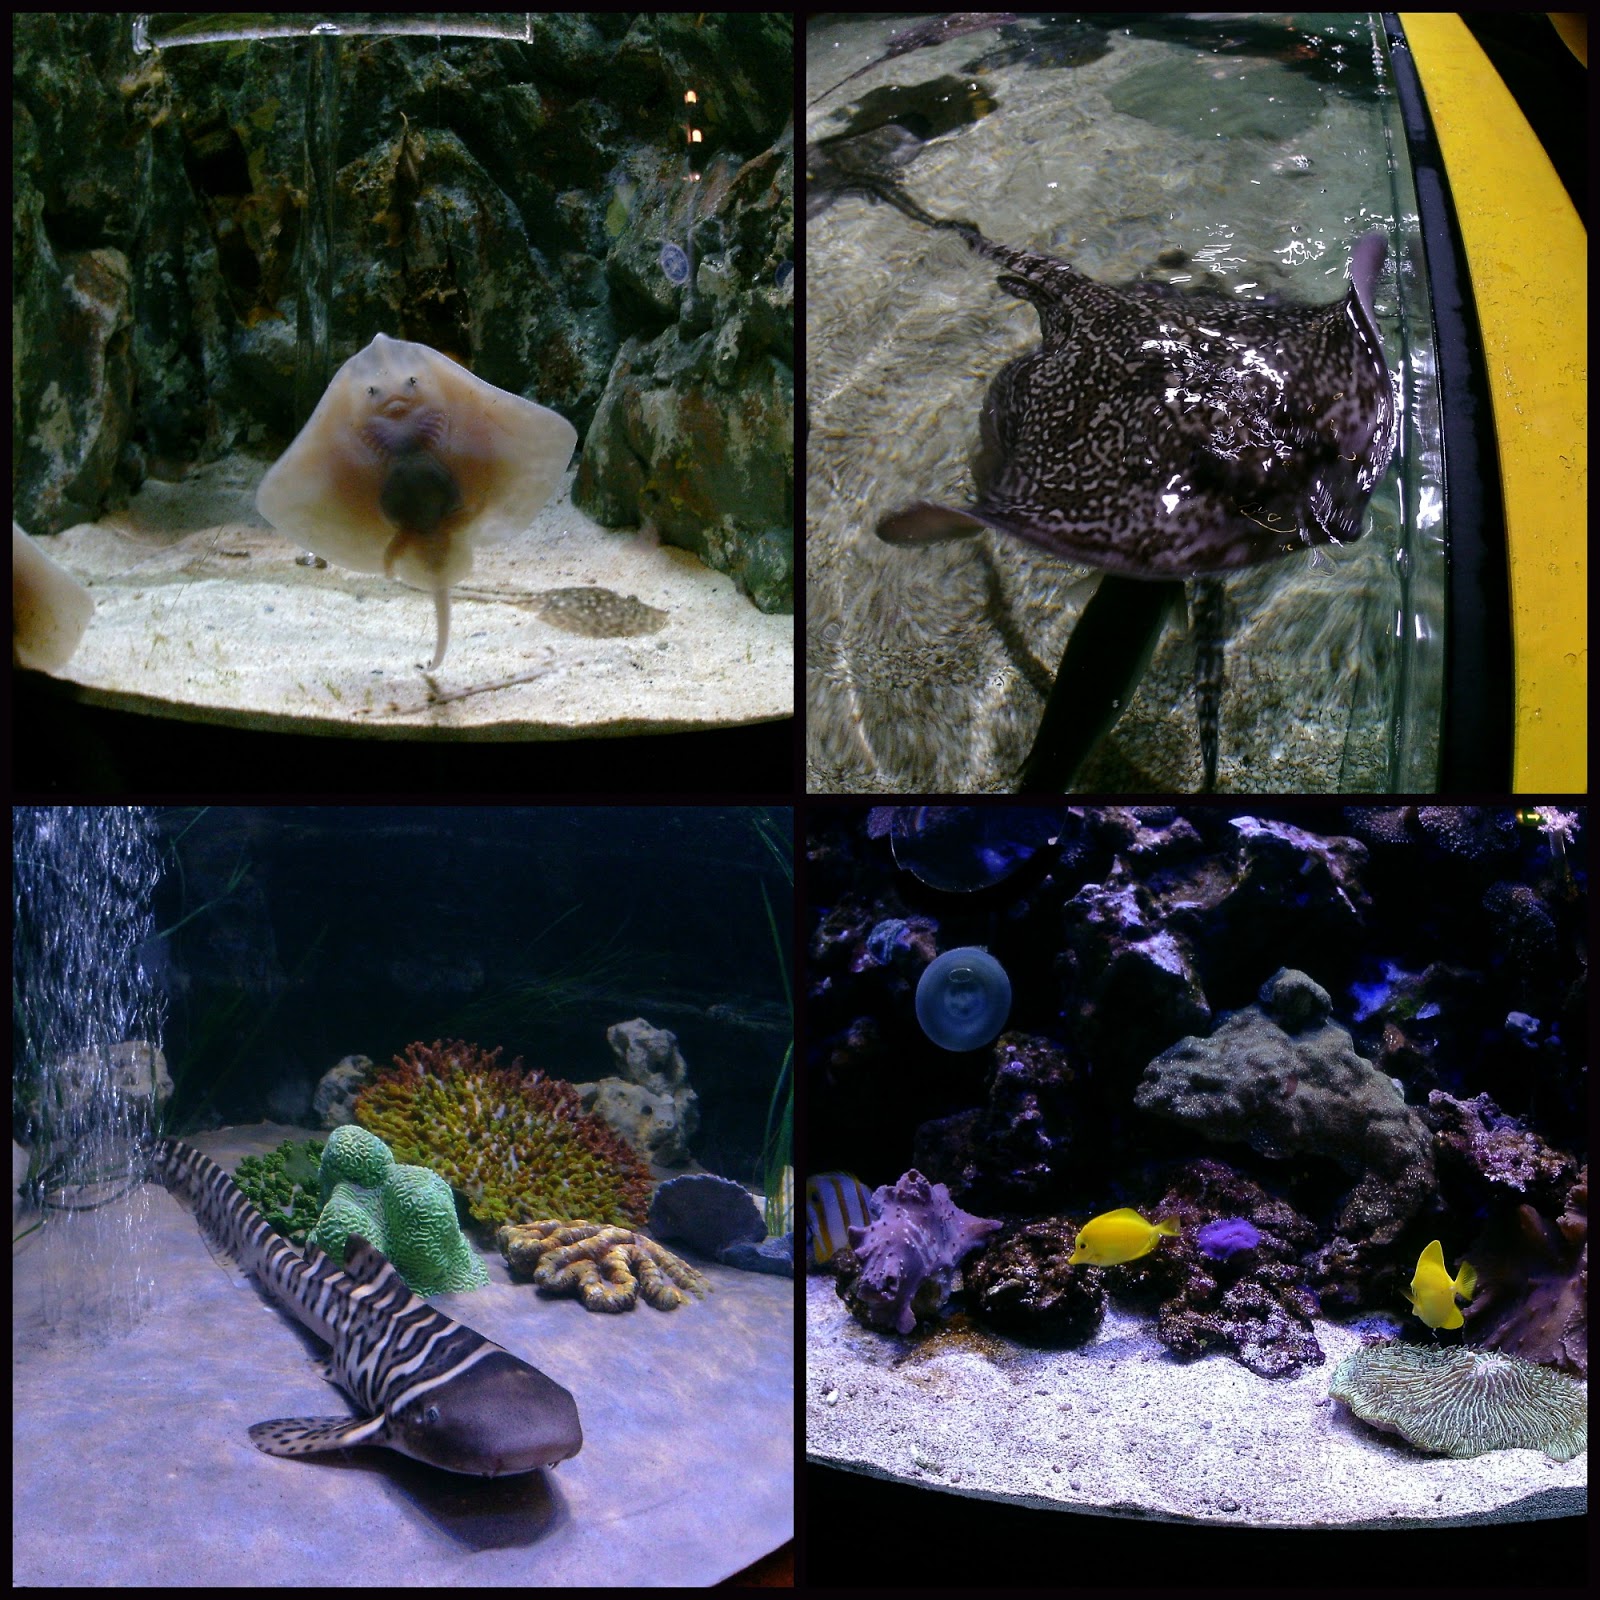
The Sealife center is filled with massive aquariums which of course is set in darkness except the light from within the glass tanks. So the KitVision Escape is dealing with low light, movement and glass. These 3 things are what most cameras struggle with. We asked if we could put the cam in some of the aquariums for special footage but we were not allowed as it could add human bacteria into the aquarium.
We were both surprised at how stunning the footage was once we got home and uploaded it on the system.
It took my breath away with how gorgeous the video footage was and I cant wait to just show you rather than waffle on. Take my word for it for now its stunning.
Colours well saturated, images and video bright and crisp. Audio clear.
For the next bit of footage we decided to attach it to our jeep, and do a little off-roading for the sake of science of course.
We did actually need an extra clamp just to make sure it was secure as the roof has an odd shaped edge...but it worked beautifully as you will see in the Footage video coming soon.
Remote Viewing First of all this needs to be a separate post in itself as I have to so much to show you; but Ill try and cram the main details in this post. When I first got this little cam I assumed it wasn't going to be much better than the Splash which was already fantastic and I even had doubts of what made this one almost double the price...well where to start...wifi..and...remote viewing...oh my goodness wow Im so excited with this setting. I don't have this on any other action cam I own. I have separate units which do this but not an all in one.
So what is remote viewing? First of all you simply download an app from Google Play or itunes called iSmart DV this clever little app allows you to place your cam somewhere else and you view what the cam is seeing in another place.
Soo what on earth would you need remote viewing for...loads of reasons; Dashcam, roofcam, undercar cam, birdtable cam, dog cam and thats just for starters. But most importantly you can use it for security as long as it is within your own wifi and have enough battery power. There are so many ways to use just the remote viewing alone;
Think of a baby cam.
Keeping a close eye on the kids upstairs in their bedroom.
Putting it in the garden to watch the kids while having a quiet cuppa indoors.
Watching a disabled child or someone ill in be.
Dashcam.
Roofcam.
Birdtable Cam.
Dog Cam.
Racing car Cam.
Keep an eye out for the postman Cam.
A Cam Cam. Ok I made the last one up but you can see that I like it.
Let me know when you think of some more ideas Im really interested. But for me you know I love my wildlife so that was my first thought.
Pairing with Wifi First of all you need to pair your Escape to your device you wish to be viewing from; this is identical to Bluetooth pairing those of you that have done that before.
Both my S4 and my Nexus 10 found the wifi and the Escape quickly and easily.
I did however have a few teething problems getting it to stay paired with wifi, it seemed to have a time limit of approx 15-20 minutes before it crashed, but apparently this seems to be from the app itself which I will hope they will add updates soon. Despite this I got some fantastic footage and Im in love with this aspect of the Escape.
I set the Escape up in 3 different positions around my garden and on my bird feeder.
Cam over seed tray.
Cam opposite feeder in the bushes.
Cam opposite the complete feeding station.
This was my 1st position and I did get some great birdy action from a distance and it did allow the birds to get used to the tripod infront of their "restaurant".
(Part 3 video coming soon).
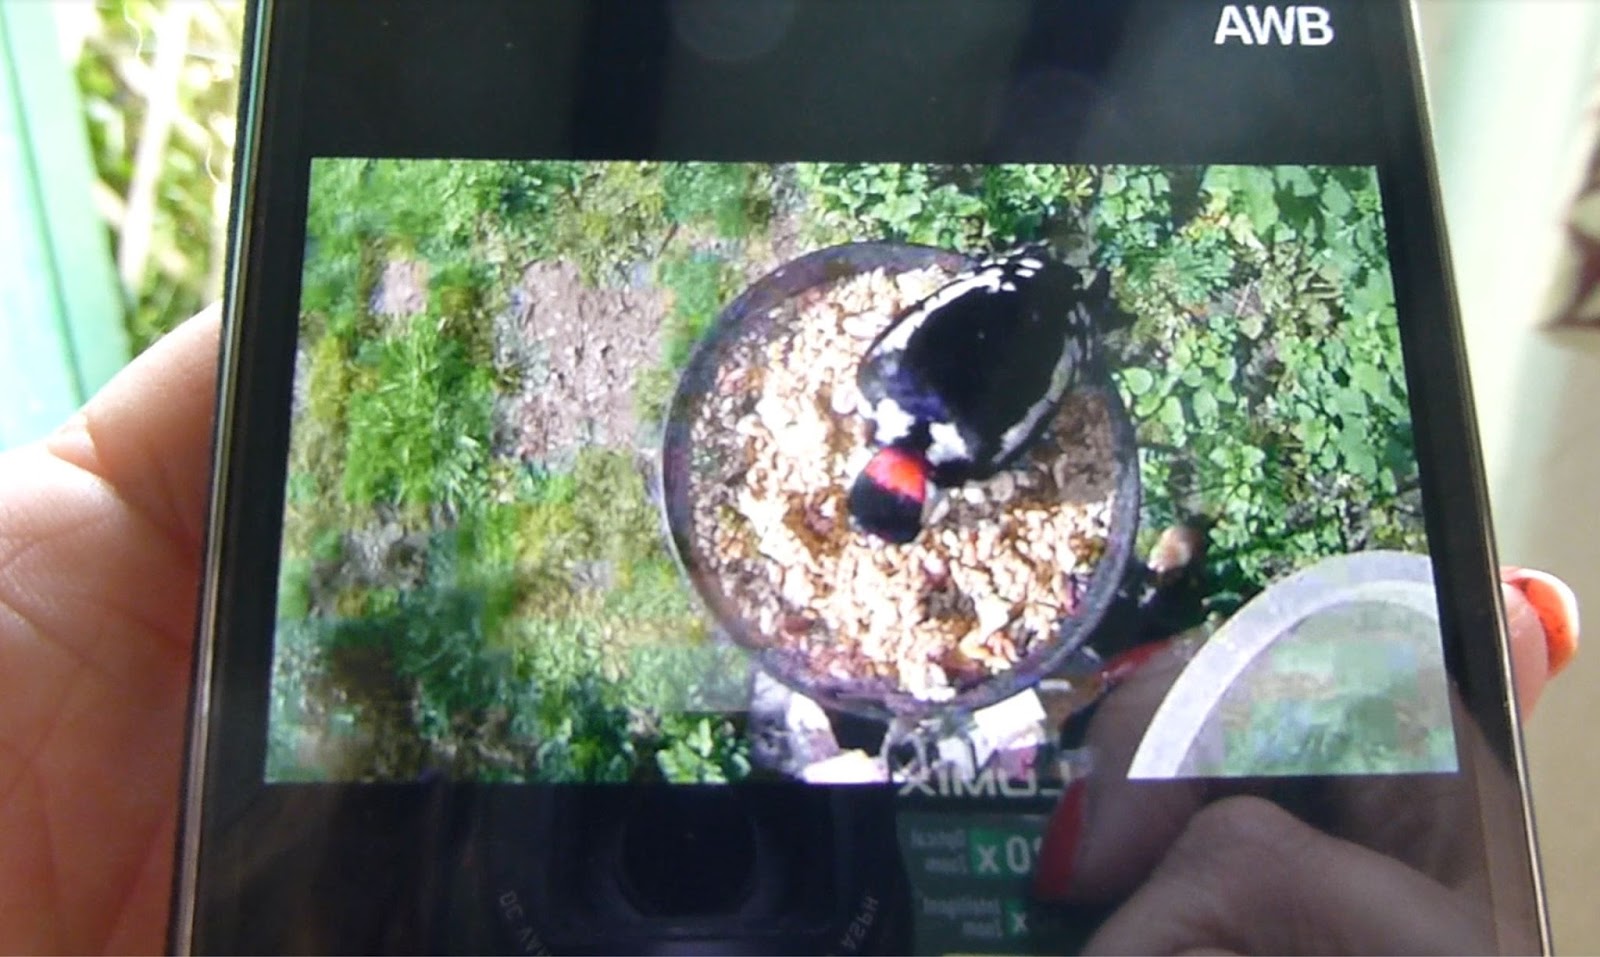
You can see here the live viewing on the app on my S4; its so clear too.
Area 2 showed up really well on screen as it was shaded from the sun.
The best position was directly over the seed tray and wow it captured my shyest bird and his female.
This was some Woodpecker footage I was viewing live on my phone sitting in my lounge drinking a cuppa. I would never have seen these guys otherwise as they are sooo shy.
The live footage is bright, colourful and sharp as watching TV.
Here you can see a screen shot of the app and live view on both my S4 and my Nexus 10, the screen is identical to viewing on a phone or tablet; but of course its so much more fun on a larger screen, so I always use my tablet now.
Note: you cant view 2 devices at once, its1 at a time.
You have complete control of the cam and can click record video at anytime or snap a pik with the record button at the bottom. This records directly onto the SD card on the Escape; not on your device your viewing from.You can see the icons at the bottom show how easy it is to switch from video to camera at a touch, it also shows the battery of the Escape NOT your device this is genius.
You can also view the images or video you have just taken on your device from the Escape while they are connected...Im in love!
Plus the app has a few settings too; but ISO, movie size or exposure etc has to be done in the camera before setting it up.
One of the photos taken from the Escape.
My Lesser spotted Woodpeckers were frantically flying too and fro feeding their chick..(which I haven't seen yet.) I didn't even know this little fella had a mate, let alone a chick so this cam opened my eyes to whats in my garden. Sorry you have to be a birdy person to understand my excitement.
I have to say I was blown away with such amazing footage and the quality too was incredible, the video is bright, crisp and sharp whether recording normally or remote viewing.
You do have to stay within your wifi range to keep connection and I found it started to crash as I walked away at around 30 feet and of course you have to be aware of thick walls and other wifi devices (we have quite a lot) that could interfere with the cam. You simply have to play around to find whats right for you.
Just a bit of geeky fun Well if having a Wall-E Cam makes me seem a bit of a Geek, then Geek me up. You guys may know how much I love my robot Walle's; well it just had to be done as specially as we had a few of the stickies in the accessory kit. Like this review isn't long enough already but this was fun.
Plus to show you guys this amazing little Escape can stick to almost anything even Walle's head.
Just to show you what Wall-E is seeing on Wall-E cam, despite being slightly wonky.
We then used remote viewing to get some fun video of annoying the hound...just a little bit...
As you can see he was not impressed at all at being followed around the garden by a foot high robot. You can see here he's trying his ignoring technique he uses on me regularly...I wonder why?
Video Part 2 I just want you to see just how much fun this setting alone is.
Video 3 Video footage samples
KitVision Escape Photos
Photos I was pleased with the images the Escape took at the Sealife Center considering it was without any flash or daylight. I have not altered these in any shape or form they are as they came out the camera. Not bad eh! It has the settings of a high-end camera being 12 million pixels with 10 fps on fast shot mode. The colours are well saturated and it managed to capture movement too without any flash or upping the ISO and through glass...Im impressed.
A few more I took and again good colour and quality.
Recording video.
(Staring the KitSound Swing)
Opinion I LOVE my KitVision Escape I have the KitVision Splash which is also amazing but this does alot more and thats shown in the price. Im blown away yes I said it again its a fantastic, fun little camera. Its extremely well built and feels substantial in weight and looks more expensive than it is. Plus it looks so damn sexy too.
The quality of the video is gorgeous; its crisp and well saturated and the audio is just as good. Its also easy to set up and alter on the fly too. I used the cam in extremely low light and through glass at the Sealife centre and the footage is just gorgeous; it was as if it were almost daylight and the colours were beautiful of the fish.
For me what stands out is the wifi Remote viewing...oh my goodness I cant stop using this, if its watching my many wild bird feeding stations around the cottage or just watching our elderly dog downstairs when Im upstairs to check he is ok...dog cam....its definitely the most favorite part to owning this camera.
Its small and light enough to fit easily into most handbags and most jacket pockets for the guys. I personally have got a generic case to keep all the mount attachments and cam together. Another great tick for this cam is the battery life; we spent 2 hours at the sealife centre and I still had charge left after videoing on and off most the time. *Note;Remote viewing I have found doesn't use as much battery as the LCD screen switches off, but its still recording inside.
My only niggle is that even though it has wifi you cant upload to your PC or to social media despite having wifi; you still have to take the card out which seems strange in this day and age; but its no problem to me.
I have to say too about how great the image stabilization is for those of you like me who may have shakey hands or that do high energy sports like mountain biking or skate boarding doing jumps etc. I was shocked at how stable my Sealife centre footage was considering it was handheld and moving all the time; yet it showed it was fluid and smooth when moving...brilliant!
To sum up its amazing quality, great design and you get a bag full of accessories, buy a card, charge it up and your ready to go.
*I will be uploading PART 2 " Remote Viewing" and PART 3 "Video footage" in the next few days.
I have been rushing so much to just get this up for you guys, I haven't finished editing all my video footage as Ive got miles of it to go through and I hope you will like it when Ive finally posted both videos.
Pro's
Full HD Video
12 million pixels
Built in Wifi
LCD screen
60m waterproof case
Remote viewing
Amazing image stabilization
Bag full of accessories.
Con's
No case or pouch for all the accessories.
Despite wifi you cant upload any footage using it.


 All my thanks goes to Eachine for kindly sending me this lantern for this review. All my views and opinions are my own.


