
Build is nearly finished.


Ribbon cable
Adding the ribbon cable, a couple of gentle bends and they push right into place, this came with the break out board and has the right amount of 40 pins for the new Pi, 14 extra than the original Pi allowing me to connect extra goodies.
Just wanted to add that, that is in part why I came up with the name ZX 3.14 - Spectrum was the third mini computer from the ZX lineup, zx80, zx81, Spectrum and the 14 was because of the extra pins. Pats Herself on the back.
Please see more after the jump.

Touchscreen
I realized once having the Adafruit 2.8 screen in my hands that the keyboard just wouldn't fit because the screen pushes onto the pins on top of the Pi, so exchanged it for the DFRobotic USB 2.8 screen (above) from Pimoroni a brilliant firm as they are extremely knowledgeable in all things Pi.
By the way which means I can run it from the Pi's USB and it also powers it. There is a larger screen available but it just would not fit in the available space, my plan is to have a computer in a box when the keyboard is fitted it looks to the uninitiated like thats how it came from the production line.
Shusshh no-one will know....!


I hunted through all my past power packs but not one would fit in the space that was left in the box and I also wanted one that would put out 5V at 2 AMP and with the ability to run the Pi etc while also being charged itself; thus allowing it to act like a Uninterruptible Power Supply (UPS). As you may know the Pi doesn't much like any surprises when reading or writing to the card, this way I can do a SUDO shutdown if I forget and pull the plug or just take it to another room,without having to reboot.

Powerpack and the ZX Spectrum's own space-bars
I needed to space the power pack off the base of the case for fitment of USB spagetti and to allow me to insert/remove micro sd card beneath. What better spacers to use than old space-bars from the Spectrum's which I then cut and filled flat.

Glueing in the spacer bars

Spacer bars all glued in.

Powerpack now fits perfectly.
The height of the newly glued in power pack allows 1mm between it and the fully fitted keyboard above it.
Then came the fitting of the speakers with some double sided grip pads, job done.
The next part was fitting the USB adapter and pendrive.

I used a once fitted permanent sticky pad to stick in the USB adapter, a one shot stick, no shakey hands wanted here...eeep!

All stuck in and the USB drive plugs in with mm to spare phew!

I managed to find this super cool HDMI that swiveled and bent in any direction as I knew space was going to be severely limited. My original plan was to have a cable for the HDMI folding over the Pi and exiting out the back where the Spectrum has TV printed; keeping to Spectrum's original look; but those cables are just not flexible enough and it would have looked fugly...!

New plan build the HDMI directly into the front of the case simple and a lot neater. So I had to collar my own Dremel man to cut out some of the front plastic to make this fit neatly.

Look how snug it fits through the cutout and straight into the Pi.

Wiring in the Breakout board.
The break out board allows easy connections for the 3 volts and earth needed to run the sound Amplifier, there is also a built in switch to turn it off if I need to conserve power.

Fitting the four rubber feet underneath was as simple as peeling off the protective covers and aligning carefully in each corner, they are 8mm high and will protect surfaces from the spacer bolts and also stop the system from slipping off my desk.
Plus looks so damn good!

Doncha just love an easy-peasy job.

Inserting Noobs.
Flipping the case over allowed me the access hole under the power pack to place the micro sd card in its new resting place. With the new Pi not only is the SD card holder smaller but it has the push/push locator that is way more secure than the original push/pull that sometimes would cause a bad contact, possibly with the detriment of having to do a software reinstall.

Almost Done...Im loving the bright colours which match the original Speccy colouring.
I'm so excited I cant wait to turn this baby on...no I haven't tried it yet...I have confidence now its all built in...gulp!

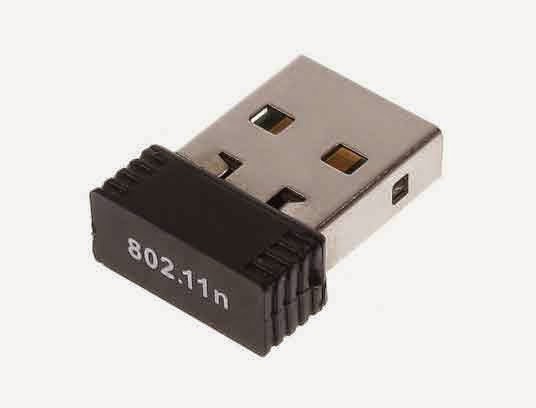
Bluetooth Dongle on the left and Nano Wifi Dongle on the right.
Of the four USB ports the two that are hidden underneath, house the WIFI to the rear and the Bluetooth towards the front of the case.
Notice the colours of the noodle cables are red, yellow, green and blue like the Spectrum colours on the keyboard case, second pat on the back coming up :-)
Red is the power cable (of course)
Yellow is power pack extension SECONDARY for projects
Green runs the USB to the screen
Blue is to the 16 gig USB pendrive.

At the back a keyboard locator has been added to hook the keyboard onto the bottom lip of the base so the keyboard sits at an angle (see below) to comfortably use the keyboard and see the little monitor easily which is angled to face you.
Are you liking this so far; Im so proud of my very first build; I wanted to get old technology and new technology together and I have and I think its so very neat as it simply looks like a normal keyboard at first sight; until you lift it off and slide it down.
Incase you missed the main build here are the other 4 posts so you can catchup with the hows and whys.
Project PI #1 Introduction.
Project PI #2 Choosing the case.
Project PI #3 Introducing the new ZX 3.14.
Project PI #4 The Build
Coming Next final installment #6 Booting up the Pi; not as painful as it sounds!
Id love to know what you think...and of course what you are building too.
Thanks for following this first build, I already have plans for the next Pi project which Im super excited about as its one of my favorite animated characters.


