Tampilkan postingan dengan label modding. Tampilkan semua postingan

Rabu, 15 April 2015

ZX Pi Spectrum 3.14 build is nearly finished #5

 Build is nearly finished.


Ribbon cable

Adding the ribbon cable, a couple of gentle bends and they push right into place, this came with the break out board and has the right amount of 40 pins for the new Pi, 14 extra than the original Pi allowing me to connect extra goodies.
Just wanted to add that, that is in part why I came up with the name ZX 3.14 - Spectrum was the third mini computer from the ZX lineup, zx80, zx81, Spectrum and the 14 was because of the extra pins. Pats Herself on the back.

Please see more after the jump.


Touchscreen

I realized once having the Adafruit 2.8 screen in my hands that the keyboard just wouldn't fit because the screen pushes onto the pins on top of the Pi, so exchanged it for the DFRobotic USB 2.8 screen (above) from Pimoroni a brilliant firm as they are extremely knowledgeable in all things Pi.
By the way which means I can run it from the Pi's USB and it also powers it. There is a larger screen available but it just would not fit in the available space, my plan is to have a computer in a box when the keyboard is fitted it looks to the uninitiated like thats how it came from the production line.
Shusshh no-one will know....!


I hunted through all my past power packs but not one would fit in the space that was left in the box and I also wanted one that would put out 5V at 2 AMP and with the ability to run the Pi etc while also being charged itself; thus allowing it to act like a Uninterruptible Power Supply (UPS). As you may know the Pi doesn't much like any surprises when reading or writing to the card, this way I can do a SUDO shutdown if I forget and pull the plug or just take it to another room,without having to reboot.


 Powerpack and the ZX Spectrum's own space-bars
I needed to space the power pack off the base of the case for fitment of USB spagetti and to allow me to insert/remove micro sd card beneath. What better spacers to use than old space-bars from the Spectrum's which I then cut and filled flat.

 Glueing in the spacer bars


Spacer bars all glued in.

 Powerpack now fits perfectly.
The height of the newly glued in power pack allows 1mm between it and the fully fitted keyboard above it.
 Then came the fitting of the speakers with some double sided grip pads, job done.
 The next part was fitting the USB adapter and pendrive.
I used a once fitted permanent sticky pad to stick in the USB adapter, a one shot stick, no shakey hands wanted here...eeep!


All stuck in and the USB drive plugs in with mm to spare phew!


 I managed to find this super cool HDMI that swiveled and bent in any direction as I knew space was going to be severely limited. My original plan was to have a cable for the HDMI folding over the Pi and exiting out the back where the Spectrum has TV printed; keeping to Spectrum's original look; but those cables are just not flexible enough and it would have looked fugly...!

 New plan build the HDMI directly into the front of the case simple and a lot neater. So I had to collar my own Dremel man to cut out some of the front plastic to make this fit neatly.

 Look how snug it fits through the cutout and straight into the Pi.


 Wiring in the Breakout board.
The break out board allows easy connections for the 3 volts and earth needed to run the sound Amplifier, there is also a built in switch to turn it off if I need to conserve power.

 Fitting the four rubber feet underneath was as simple as peeling off the protective covers and aligning carefully in each corner, they are 8mm high and will protect surfaces from the spacer bolts and also stop the system from slipping off my desk.
Plus looks so damn good!

Doncha just love an easy-peasy job.
 Inserting Noobs.
Flipping the case over allowed me the access hole under the power pack to place the micro sd card in its new resting place. With the new Pi not only is the SD card holder smaller but it has the push/push locator that is way more secure than the original push/pull that sometimes would cause a bad contact, possibly with the detriment of having to do a software reinstall.

 Almost Done...Im loving the bright colours which match the original Speccy colouring.
I'm so excited I cant wait to turn this baby on...no I haven't tried it yet...I have confidence now its all built in...gulp!

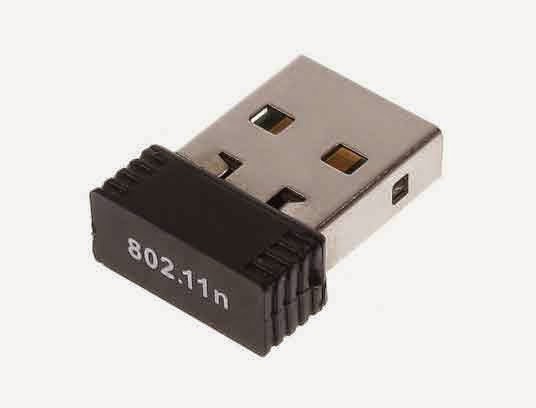
Bluetooth Dongle on the left and Nano Wifi Dongle on the right.
 Of the four USB ports the two that are hidden underneath, house the WIFI to the rear and the Bluetooth towards the front of the case.


So now its just tidying the cables, the black splitter cable that runs from the rear then divides into two is the power in to the power pack and the other lead is for running any PRIMARY projects that don't need to come from the power pack.
Notice the colours of the noodle cables are red, yellow, green and blue like the Spectrum colours on the keyboard case, second pat on the back coming up :-)

Red is the power cable (of course)
Yellow is power pack extension SECONDARY for projects
Green runs the USB to the screen
Blue is to the 16 gig USB pendrive.

 At the back a keyboard locator has been added to hook the keyboard onto the bottom lip of the base so the keyboard sits at an angle (see below) to comfortably use the keyboard and see the little monitor easily which is angled to face you.

Are you liking this so far; Im so proud of my very first build; I wanted to get old technology and new technology together and I have and I think its so very neat as it simply looks like a normal keyboard at first sight; until you lift it off and slide it down.

Incase you missed the main build here are the other 4 posts so you can catchup with the hows and whys.
Project PI #1 Introduction.
Project PI #2 Choosing the case.
Project PI #3 Introducing the new ZX 3.14.
Project PI #4 The Build


Coming Next final installment #6 Booting up the Pi; not as painful as it sounds!

Id love to know what you think...and of course what you are building too.
Thanks for following this first build, I already have plans for the next Pi project which Im super excited about as its one of my favorite animated characters.


Senin, 23 Maret 2015

Project Pi ZX 3.14 Part #4 - The Build


Welcome to the NEW ZX 3.14
You don't need me to explain the name do you...?


So I'm back again with Project Pi #4 and I have finalized the name ZX 3.14 (Pi...right) Phew!

If you haven't seen my previous posts here are the links to get you up to speed...where have you been...sigh lol!
Project PI #1 Introduction.
Project PI #2 Choosing the case.
Project PI #3 Introducing the new Spectrum.

My last post showed you all the bits ready to go into the Spectrum case but weren't fitted yet. So I will now go through with you how Ive managed to fit everything into this case and I must admit when I had everything in front of me I started to have some doubts whether I could get everything to fit...eeep!
So lets get started.......

Click after the jump for my full post


Finishing up the keyboard.
Well the Bluetooth keyboard is fixed into place as the lid; but of course the underside has to allow enough room when closed for everything else. Infact it just needs to close as it would as a Spectrum.


I realized that it would be best to set the 2.8" screen at the back on the left at an angle so it can be viewed easily with the keyboard off.

Ive had a few comments from some of you (Thank you I love your input too) wondering why I'm putting the screen inside the case; well the first thing is its different, I wanted everything to be a contained unit. Secondly its not been done...I hope. 
I will still be attaching HDMI, but its nice to have the options, making it portable. So the idea is to have the screen sitting at a viewable angle so its still comfortable to use within the case without having to keep taking it in and out.
Ive blurred the edges of this image as its now all fitted in and I don't want to give it ll away yet lol!

 But because of this idea I hit my first problem in that it would not leave enough room for the keyboard above it to close.


 It was just millimeters but they counted...so....drastic action would be needed...calling in my other half...Dremel man; time to cut the outer corner and remove the battery cover, (for insulation it will be taped.)
Yay now it fits without touching the screen.

 Easy custom, added a raspberry Pi sticker over the windows key; quite ironic lol!


There are not many actual Raspberry Pi diagrams out there so here you go there is now. Because I wanted the Pi to be in the center with ancillaries either side it dictated where the connectors were going to be positioned.


3D render of the Raspberry Pi 2 Plan with wiring.

It wasn't until I produced my 3D render of ZX+Pi that I realized I would have to be careful where everything would fit or I would run out of space. It helped my understanding that try as I might if the screen was going to be built in, it would be better placed at the back and there was no way I could get the HDMI cable to wiggle its way over the pi under the screen and exit out the back like I had originally planned, so a new idea was formed with a 90 deg HDMI connector, if even such a thing existed.

It was also thanks to my render that it came to me if a power pack was going to join the party I would have a problem inserting/removing the bootup card from the Pi, a hole would have to be cut underneath the power pack.


After hunting around my graveyard of gadgets I came across an old hand control from my Nintendo that was gathering dust, so in I went and after some minor surgery came out with a amplifier and two speakers.


Getting the amplifier in place my fixit bonding putty came to the rescue once again.

Then it was finally onto fitting the Pi an exciting but also nervous moment; four 3mm holes and some tiny bolts/spacers/nuts later and the Pi had a home he could be proud of.


With the Pi fitted I could see exactly where the breakout board would go, this was dictated to by the length of the ribbon cable, again 4 bolts etc and it wasn't moving. Plus my nails make THE best spanner.

 It was also secured using the original pezo electric speaker hole in the case with a washer; saving another Dremel hole.

My plan is that like a PC I would keep the main operating system, separate from a storage medium, the best choice for that would be a small USB thumb-drive, 

I had nothing that was small enough in my USB drive collection so I ordered a 16GB Sandisk Mini drive at the bottom of the picture, you can see the size comparison and I wouldn't be needing the cover cap, so yup its tiny.


16GB Sandisk mini drive and a USB 2.0 female-to-micro USB female adapter.
I chose a 16GB Sandisk that was USB 2 and USB 3 compatible for easy transfer between zx+pi and my PC, that was the easy part but trying to find a compact micro female to female usb adapter was another thing, don't they know people haven't got the room in there project cases.

"SHE CANA TAKE ANY MORE CAP'N"

As with any good storyline I want to leave you on the edge of your seat.
#5 coming soon re; finding and installing power-pack, wiring breakout board and more.


Incase you missed the first 3 posts you can catch up below
Project PI #1 Introduction.
Project PI #2 Choosing the case.
Project PI #3 Introducing the new ZX 3.14.
 Project PI #4 The Build
Project PI #5 Finished Build


Sabtu, 14 Februari 2015

Project PI part #2 Choosing the case.


This is part #2 of my new Raspberry PI 2 Build.
 
I wanted to choose a case for my new Raspberry PI 2 but wanted something different rather than just a standard shop bought PI case...although...thats perfectly ok too! There are so many gorgeous cases out there but they can be a bit plain and I wanted something more unique after-all it is Gadget Girl.

My other half has a wonderful collection of Sinclair micro computers a gorgeous museum to how computing all began....yes we can remember these and its so nice to see a full collection and growth of the computer industry.


Here is the wall of just some of his computers; so its now seeing if there are any spares he wont mind me cutting up...destroying...er...I mean gently modding!
It would be fantastic to combine both modern and vintage technology!

Although I don't think he'd let me sacrifice his ZX80 as his owned it for 35 years it would be the end of Gadget Girl....steps slowly away from the ZX80... ;-)
As its Valentines Day I need some serious grovelling so off to bake him an Apple Pie; a pie for a PI.


He also has this gorgeous mini ZX Spectrum phone case; wouldn't this be the most perfect PI size case for it...ok...I know...apart from all the static and fabric fibers so no, I cant use this unless I put it into a small plastic PI case first; but this would be just tooooo simple.


 If you missed my introduction post of Project PI #1 see here. I will be adding regular updates on this new Project PI series from start to finish! I want to bring you all with me.

Project PI #1 Introduction.
Project PI #2 Choosing the case.
Project PI #3 Introducing the new ZX 3.14.
 Project PI #4 The Build
Project PI #5 Finished Build
If you building or have built a Raspberry PI 1 or 2 Id love to hear from you.
Bye for now


Rabu, 11 Februari 2015

Project Pi my NEW Raspberry Pi 2 #1


I simply couldn't wait to share my new Project Pi with you all...Im buzzin...!

My fully water-cooled PC.
Ive been interested in computer technology for over 30 years and helped my other half to put together my water cooled PC I'm using right now..images above. But Ive always wanted to build one completely by myself. So when I saw that the Raspberry Pi 2 had been released I just couldn't resist.


The Raspberry Pi 2 Model B is the new version and literally only came out this month and Im so excited to be one of the first to have the Model B revision.
The original version went on sale in February 2012 and sold over 3 million to the home and education markets.
The original Pi concept was a computing board which could provide internet access with HD graphics and input output at very low cost for hobbyist of all ages. 

The Raspberry Pi 2 Model B is 6 times faster than the original; as well as a new quad core Cortex-A7 processor and now features 1GB RAM memory. Plus its now available with the new 1.4 NOOBS software (New Out Of the Box Software) which was still being re-written only last week.

This will be the first of many posts of my new Raspberry Pi 2 Mod and I think Im going to be addicted to these dinky PC's so it maybe the first of many projects as I have so many ideas of what I want to build this into.


The Raspberry Pi 2 arrived from RS Components in this fab packaging with their own logo. 
They offer the most affordable prices of the Pi 2 at this time...would you believe it is ONLY approx £22.85 Plus VAT. Which is incredible for the opportunity to learn modding with such a fun piece of kit! 
You can also get lots of cases and addons for it too...which is my next step!


 The Pi arrived in this gorgeous green and raspberry coloured (of course) cardboard box.

 The power supply comes with 4 different plug attachments for different countries so it can go traveling with me...if I ever wanted to take it.

There is something special about seeing the words Pi 2 Model B that is so exciting and I cant wait to start my new build...sorry "mod"...gotta get the right lingo!
You will have to wait and see what Im planning to build this baby into for my next post. I love retro versus modern tech and this will certainly be that!

So here she is in all her gorgeous naked electro-circuitboardness...isn't she beautiful!

I will be adding a series of Raspberry Pi 2 posts to show you what I'm doing; this post is #1 a quick introduction to the Raspberry Pi 2

Let me know if you like the idea of modding your own Pi 2 and what you would build it into. Do you have the Pi 1 already if so will you be upgrading to this Model B? 
Love to hear from you.

Project PI #1 Introduction.
Project PI #2 Choosing the case.
Project PI #3 Introducing the new ZX 3.14.
 Project PI #4 The Build
Project PI #5 Finished Build